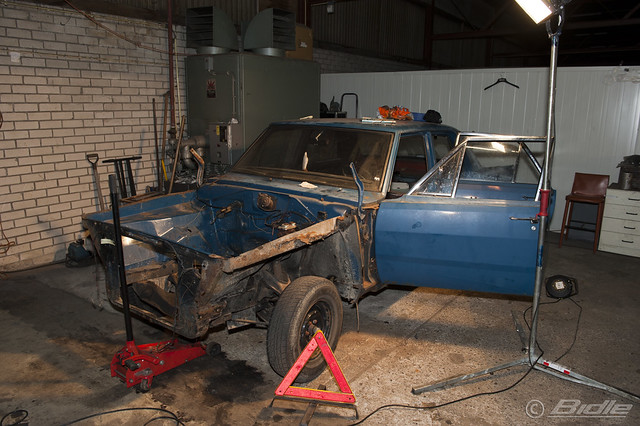
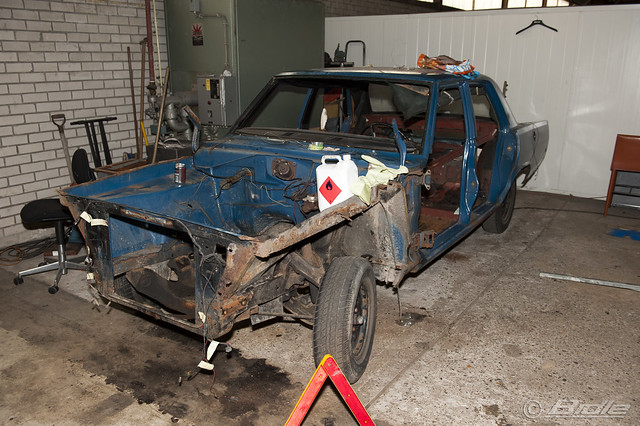
Well it has begun!! Don't really knew in which section to put this thread, but want to put all updates in this thread....
19 august 2011
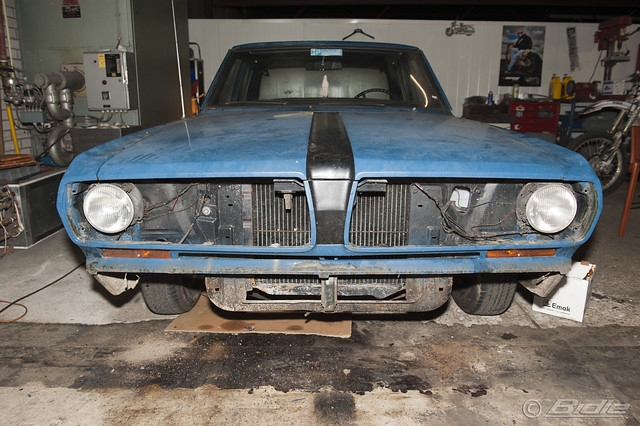
I bought the Valiant and last friday I drove it to it's new temporary home where I will restore the car with help of a skilled friend.
In the future I'll post the progress and hope you guys will/can help me with the problems I'll face. I'm new in to this car restore scene.....
Here some photo's tot start with:
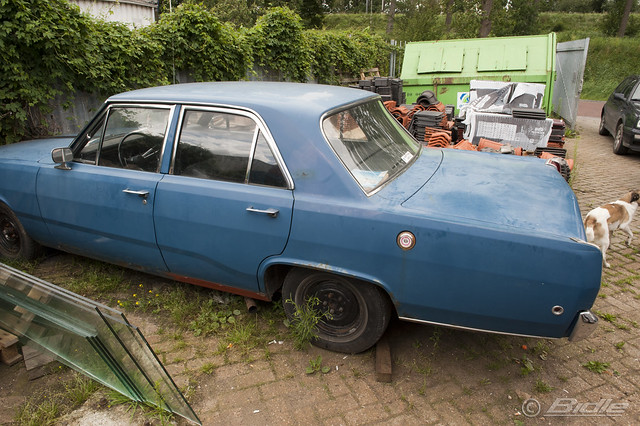
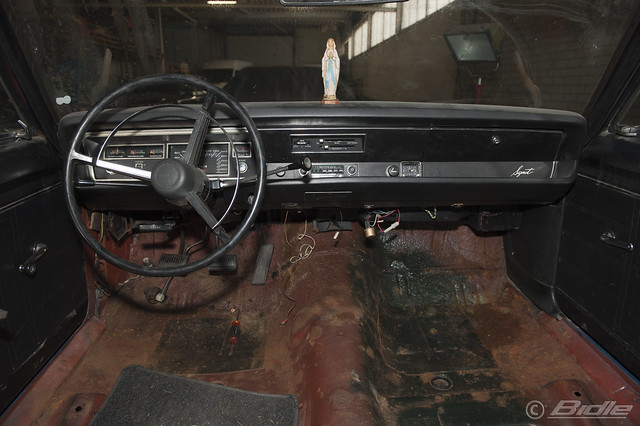
Plymouth Valiant 1968 4d 01.jpg by Bidle, on Flickr
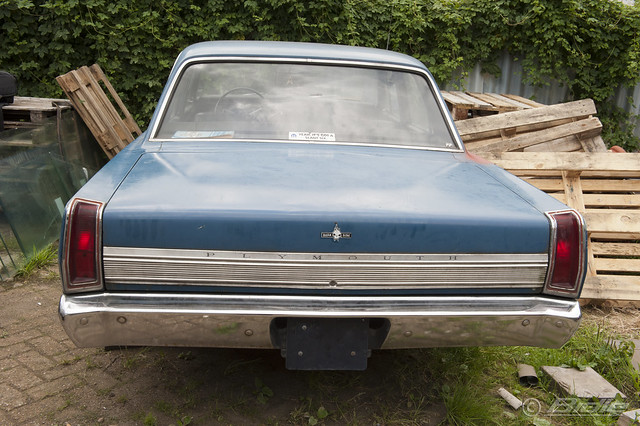
Plymouth Valiant 1968 4d 02.jpg by Bidle, on Flickr
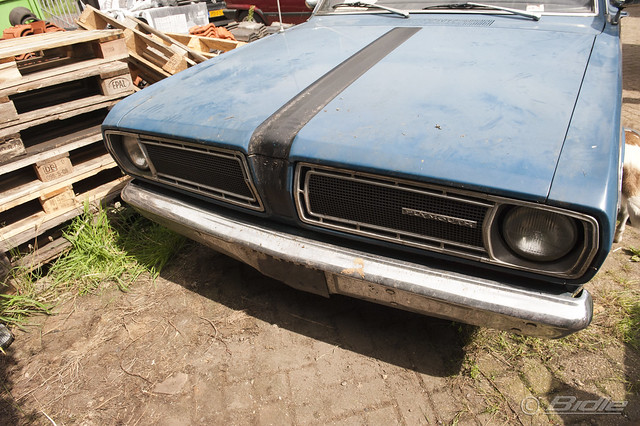
Plymouth Valiant 1968 4d 03.jpg by Bidle, on Flickr
Plymouth Valiant 1968 4d 04.jpg by Bidle, on Flickr
Plymouth Valiant 1968 4d 05.jpg by Bidle, on Flickr
Plymouth Valiant 1968 4d 06.jpg by Bidle, on Flickr
21 august 2011
So today I'm started and tried to remove all the moldings from the side and the windows. It seems to work so no problem there.
Only the moldings on the door!!!! I can't remove them, think the last owner glued them or something.... so I thought what the heck I'll just try to get reproductions/new ones. Only can't find them so don't know how to continue with this.......

Tomorrow night I'll continue and make some photo's of the car and in specific the bad parts, but to be honest I think it isn't that bad at all.
22 august 2011
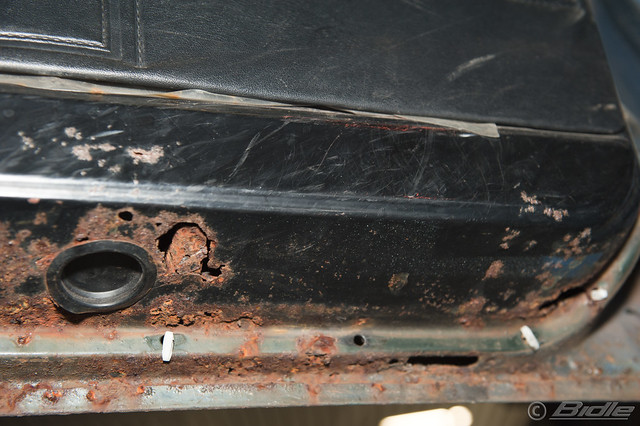
So today I found the car again in it's temporary place and made some photo's of the worst spot... well, which I can see at the moment:

Plymouth Valiant 1968 4d 07.jpg by Bidle, on Flickr
Plymouth Valiant 1968 4d 08.jpg by Bidle, on Flickr
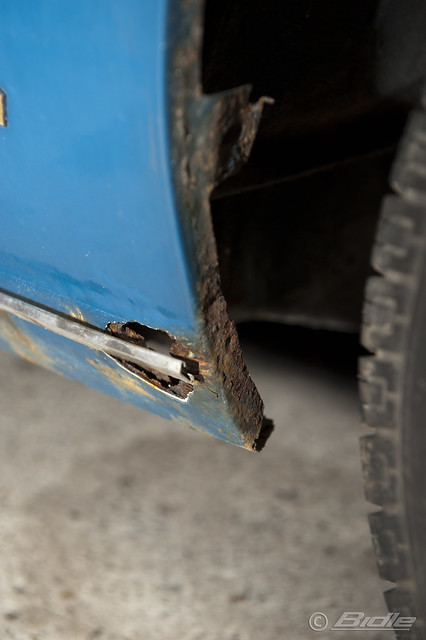
Plymouth Valiant 1968 4d 09.jpg by Bidle, on Flickr

Plymouth Valiant 1968 4d 10.jpg by Bidle, on Flickr
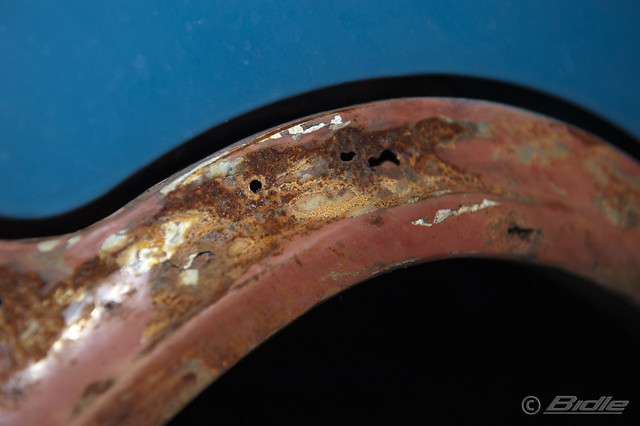
Plymouth Valiant 1968 4d 11.jpg by Bidle, on Flickr
Plymouth Valiant 1968 4d 12.jpg by Bidle, on Flickr
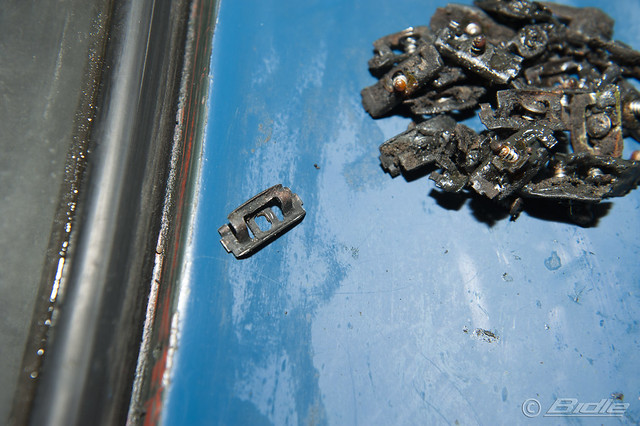
Off-course there are more spots, but just made some photo's to get an idea. After the photo's I started to completely remove the molding of the windows and it went pretty good. Some clips hold them on to their place and if they didn't do the job all the sure did!
Plymouth Valiant 1968 4d 13.jpg by Bidle, on Flickr
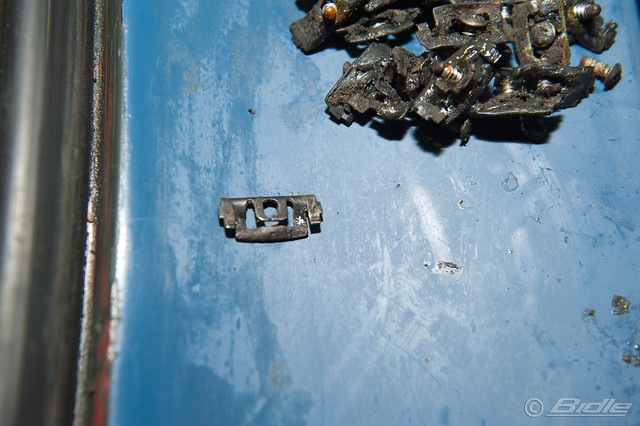
Plymouth Valiant 1968 4d 14.jpg by Bidle, on Flickr
Also nice to see that within all these years the moldings weren't removed. Still can see the exact line of the new paint-jobs. Also I have the original papers of the car and it says it was green!
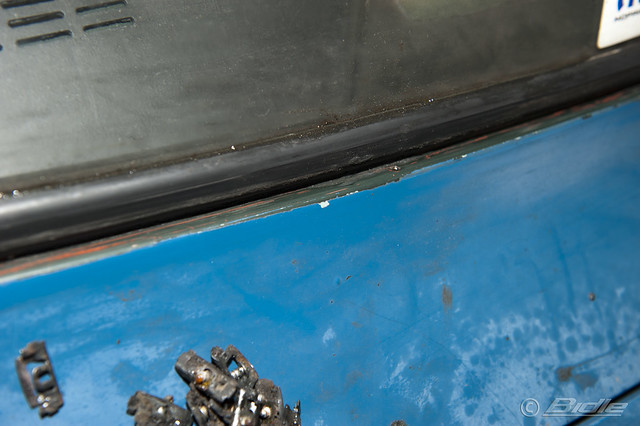
Plymouth Valiant 1968 4d 15.jpg by Bidle, on Flickr
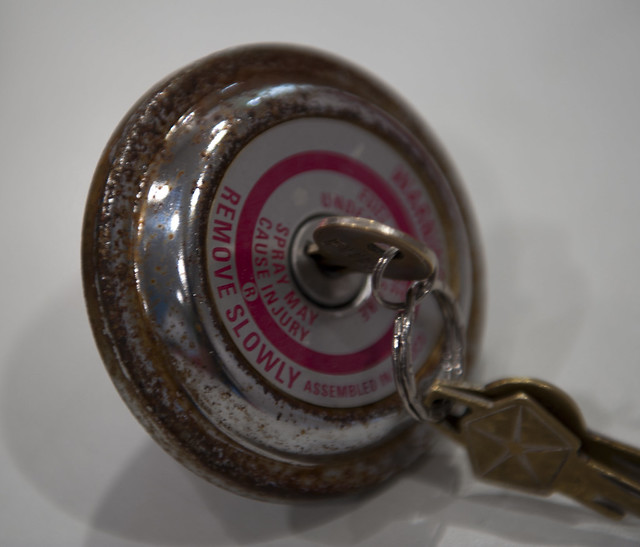
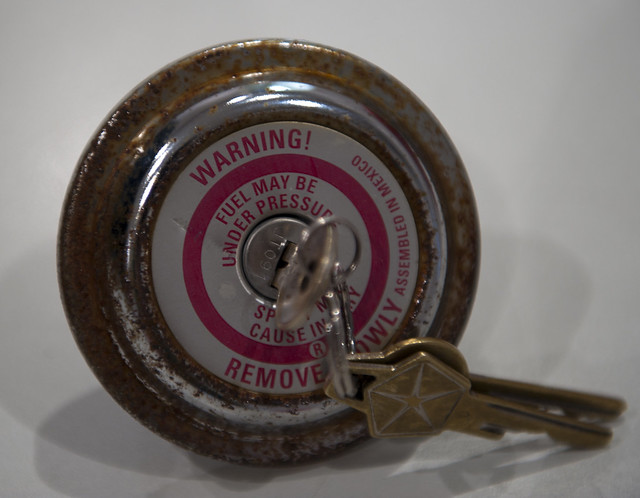
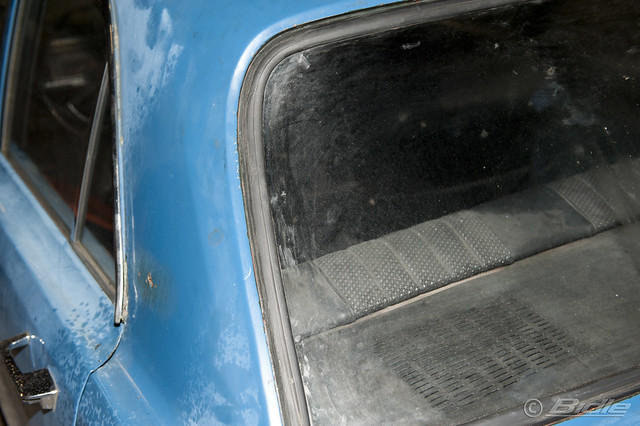
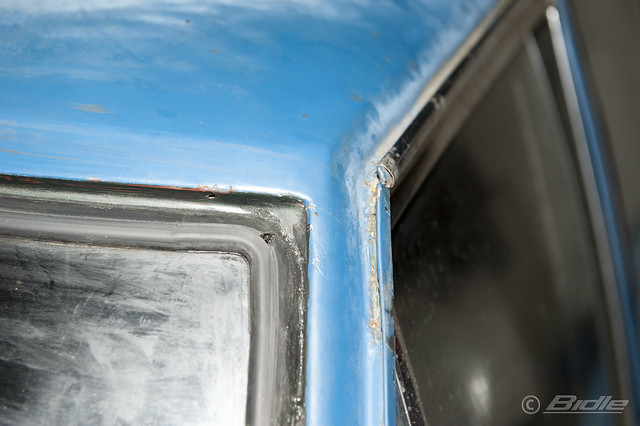
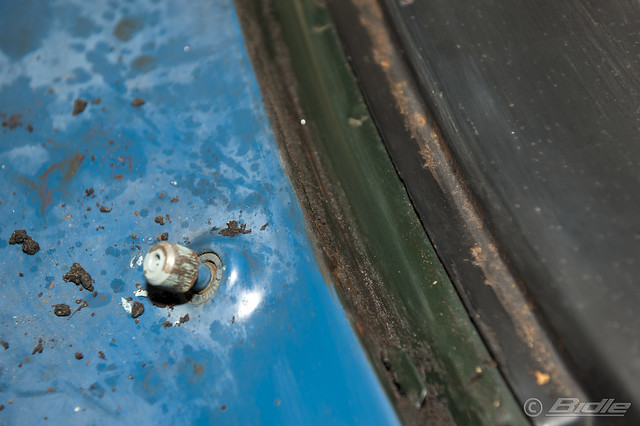
Lucky me; there was no rust to see beneath all the kit! I'll probably still remove the windows. So it's easier to remove the last clips and also will make it easier to install the new clips after spraying the car.
Plymouth Valiant 1968 4d 16.jpg by Bidle, on Flickr
Plymouth Valiant 1968 4d 17.jpg by Bidle, on Flickr
So I left the car and try to work on it as soon as I can,.... maybe tomorrow?

Plymouth Valiant 1968 4d 18.jpg by Bidle, on Flickr
23 august 2011
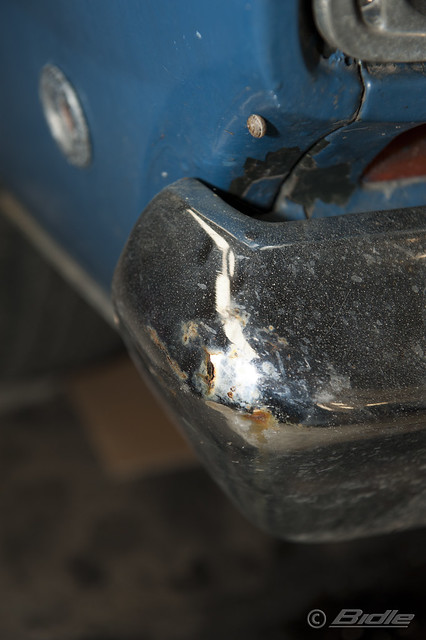
Today I left the moldings for what it is. I hope to get some advice from people who encountered this before. So I started to remove the bumpers and grill.
Only the front bumper was a bit stuck but with the right tools and WD40 it surrendered.
The left side still is in good condition. The right side isn't that great and we will reproduce it. After it we will powder-coat it. This will be done for all the smaller parts with also a primer.
We will attend to this in a later stage.
Plymouth Valiant 1968 4d 19.jpg by Bidle, on Flickr
Plymouth Valiant 1968 4d 20.jpg by Bidle, on Flickr
Plymouth Valiant 1968 4d 21.jpg by Bidle, on Flickr
As far as we can see at this point below the bumper everything looks pretty okay.
Plymouth Valiant 1968 4d 22.jpg by Bidle, on Flickr
[note]
This is a photo of the small camera which helps us to make sure we have photo's of how the car was build. So we can look back how it was when we put the car together again
[/note]

Plymouth Valiant 1968 4d 23.jpg by Bidle, on Flickr
The brackets of the back bumper is still in good condition and ready to be powder-coated.
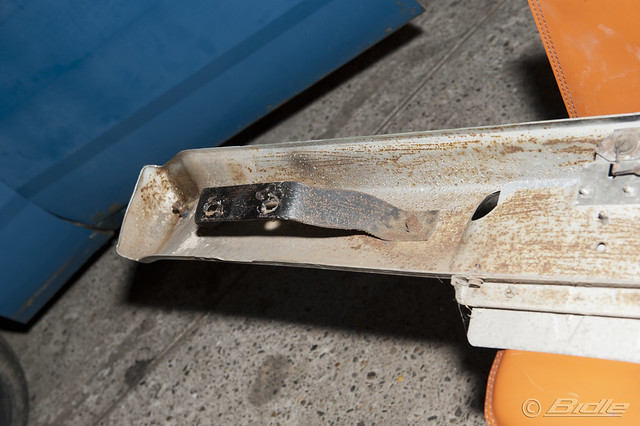
Plymouth Valiant 1968 4d 24.jpg by Bidle, on Flickr
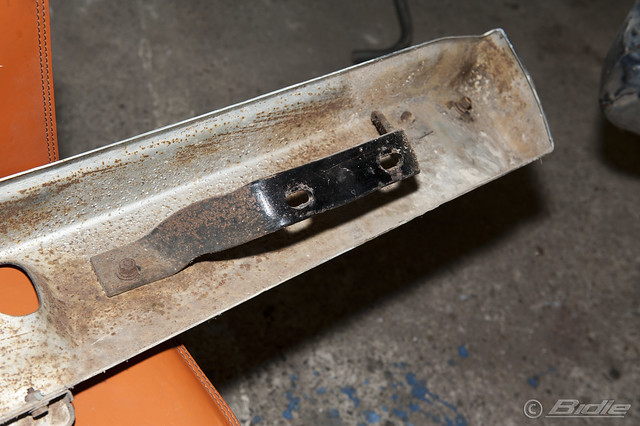
Plymouth Valiant 1968 4d 25.jpg by Bidle, on Flickr
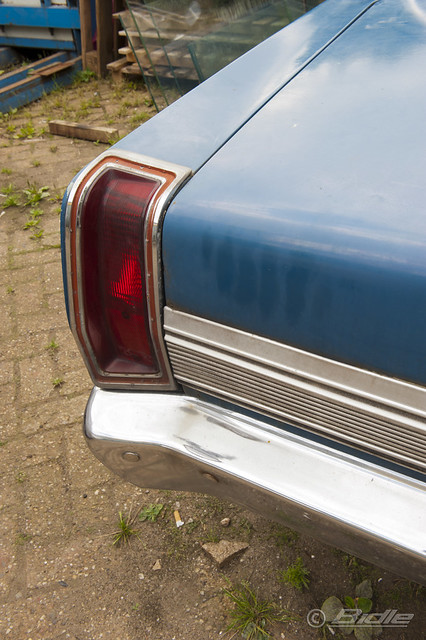
Some photo's of the back without the bumper and one more from the rear-light from '72-'73. Still don't know if I will put back the original lights or keep these. But I got plenty time to decide.

Plymouth Valiant 1968 4d 26.jpg by Bidle, on Flickr
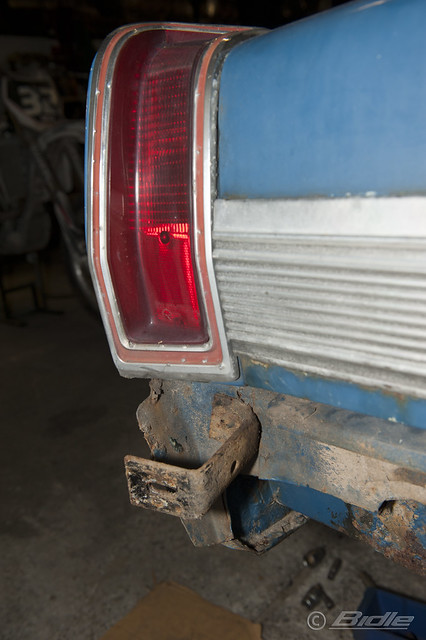
Plymouth Valiant 1968 4d 27.jpg by Bidle, on Flickr
Below the car at the back it also doesn't look bad, but enough work to do.
Plymouth Valiant 1968 4d 28.jpg by Bidle, on Flickr
Well, I left the car again and will work on it again soon. It looks kind of sad....
Plymouth Valiant 1968 4d 29.jpg by Bidle, on Flickr
24 august 2011
Didn't had much time but removed some parts of the grill:
Plymouth Valiant 1968 4d 30.jpg by Bidle, on Flickr
25 august 2011
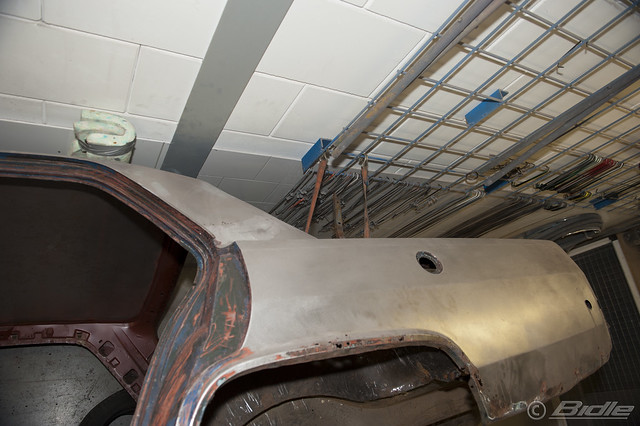
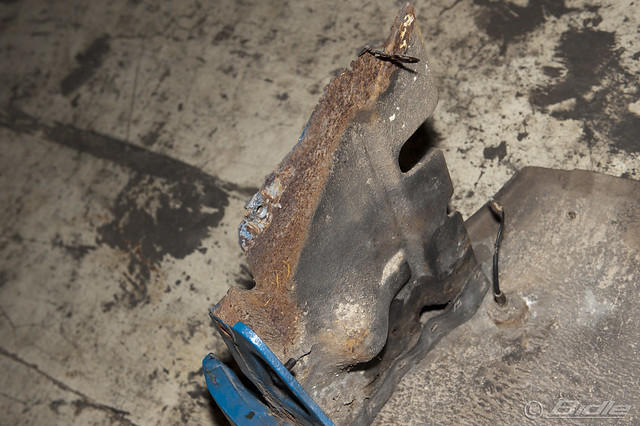
Today I wanted to remove the front fenders, but I only managed to remove only one. Behind the fender is still a lot of work to be done. Also a lot of screws broke and were stuck.
Plymouth Valiant 1968 4d 31.jpg by Bidle, on Flickr
Plymouth Valiant 1968 4d 32.jpg by Bidle, on Flickr

Plymouth Valiant 1968 4d 33.jpg by Bidle, on Flickr
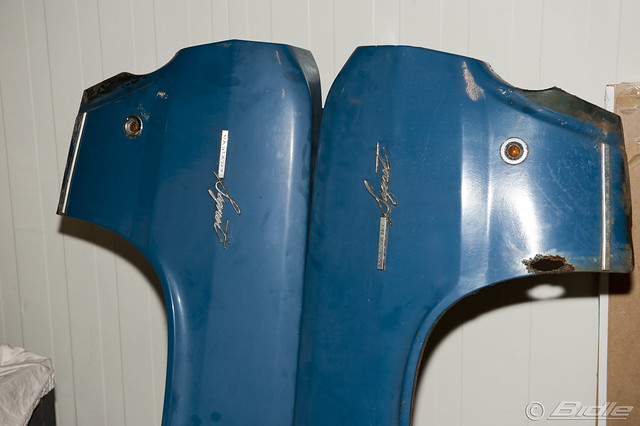
The fender also has some work and already wonder how the other side looks:
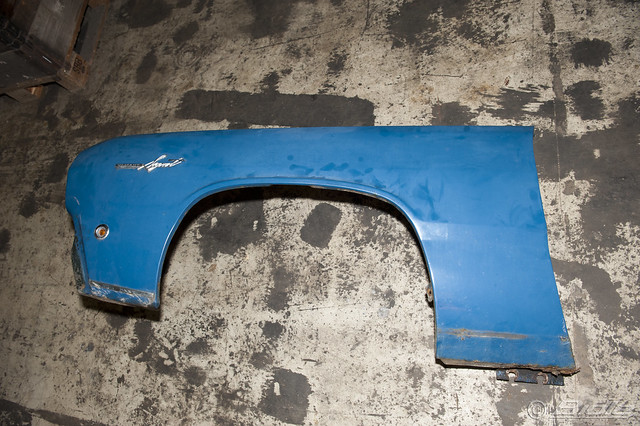
Plymouth Valiant 1968 4d 34.jpg by Bidle, on Flickr
Plymouth Valiant 1968 4d 35.jpg by Bidle, on Flickr
Plymouth Valiant 1968 4d 36.jpg by Bidle, on Flickr
So I left the car after removing the fender.
Plymouth Valiant 1968 4d 37.jpg by Bidle, on Flickr
26 august 2011
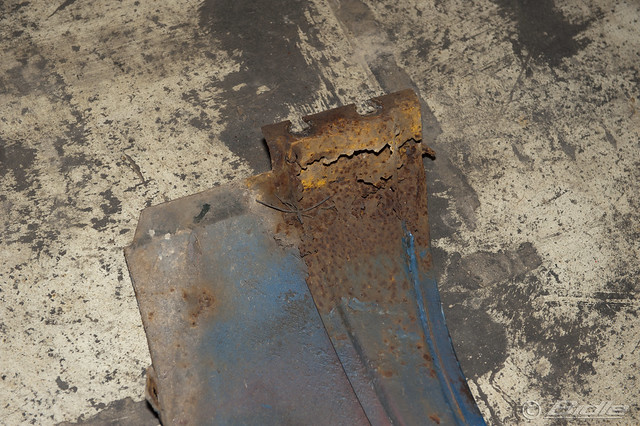
Today I wanted to remove the other front fender. Unfortunately this one was welded at the bottom. So I had to cut it, but not a big problem.

Plymouth Valiant 1968 4d 38.jpg by Bidle, on Flickr
Plymouth Valiant 1968 4d 39.jpg by Bidle, on Flickr
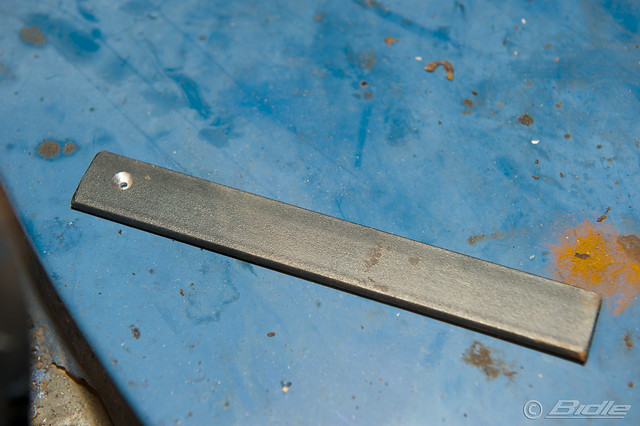
Some of the screws are won't come out, because the clip is turning with the screw. And pushing the tip of the screw is quit annoying. So a friend made this strip, so you can easily push the tip of the screw.
Plymouth Valiant 1968 4d 40.jpg by Bidle, on Flickr
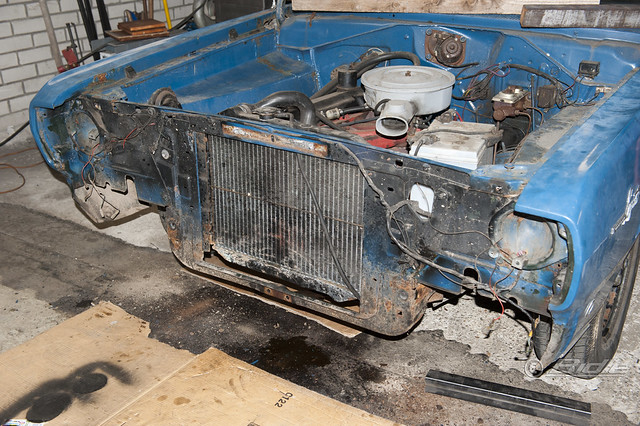
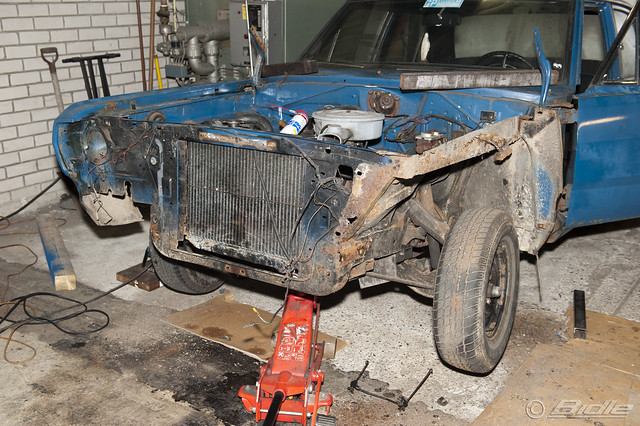
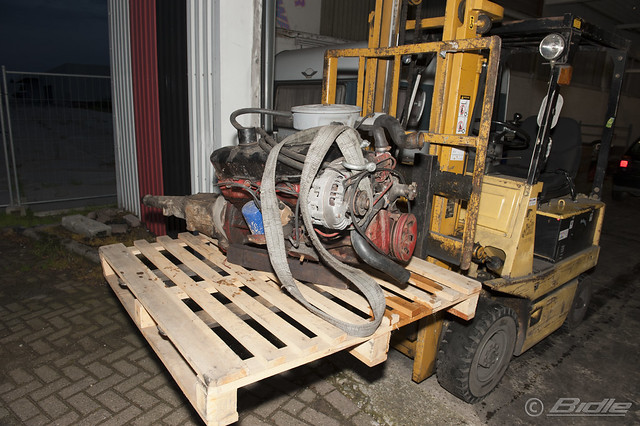
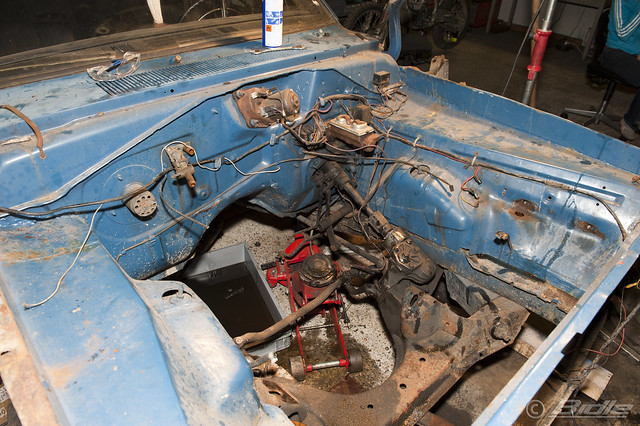
When the fender was off I still had time and somebody gave me an offer for the Slant-Six 170ci. So we stayed and disconnected everything and before we knew it the motor was hanging.
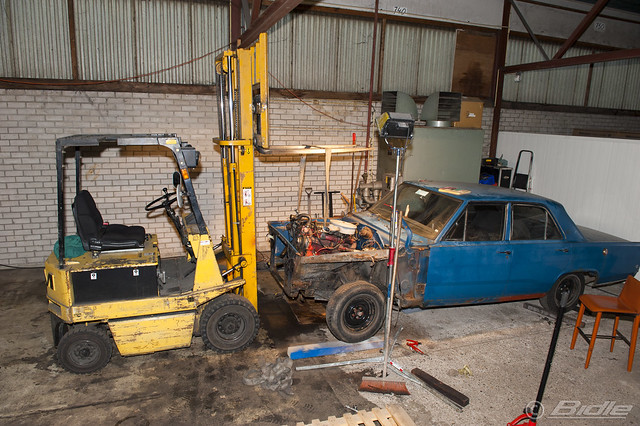
Plymouth Valiant 1968 4d 41.jpg by Bidle, on Flickr

Plymouth Valiant 1968 4d 42.jpg by Bidle, on Flickr
So out with the old and now searching for a new nice engine. The engine compartment isn't too big, but a nice V8 should be possible.
Plymouth Valiant 1968 4d 43.jpg by Bidle, on Flickr
Plymouth Valiant 1968 4d 44.jpg by Bidle, on Flickr
So I left my car for the weekend looking like this:
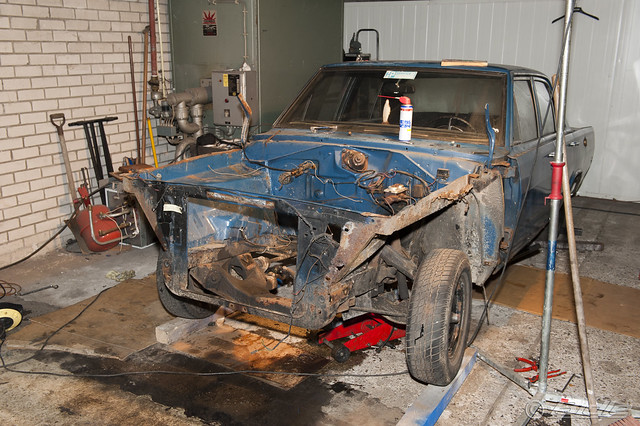
Plymouth Valiant 1968 4d 45.jpg by Bidle, on Flickr
27 august 2011
Today I went to a garage to get some info for a new V8. After that I was excited so I went back to the Valiant. I removed the rear lights and checked the difference between the original and the 72-73's. Still don't know what I want.
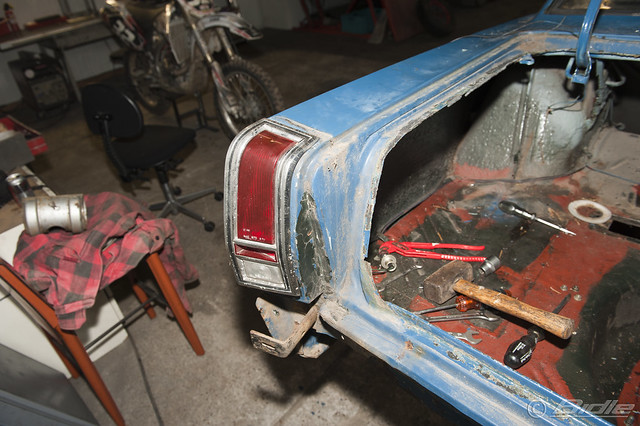
Plymouth Valiant 1968 4d 46.jpg by Bidle, on Flickr
Plymouth Valiant 1968 4d 47.jpg by Bidle, on Flickr
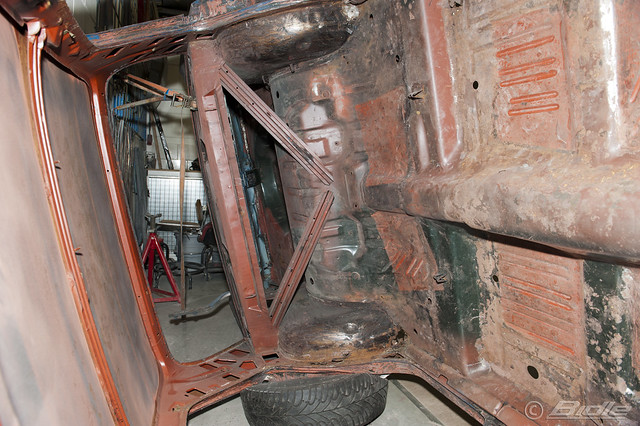
Then we started to take out the gas-tank. It was pretty straight forward. Don't know yet how we will make the new gas-tank, but it is also something for the future.
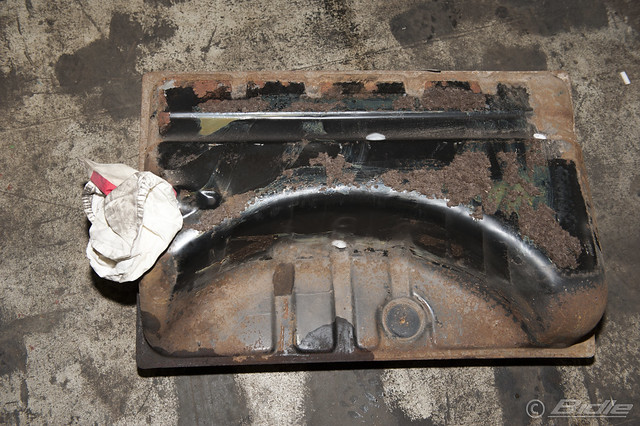
Plymouth Valiant 1968 4d 48.jpg by Bidle, on Flickr
Plymouth Valiant 1968 4d 49.jpg by Bidle, on Flickr
Plymouth Valiant 1968 4d 50.jpg by Bidle, on Flickr
Plymouth Valiant 1968 4d 51.jpg by Bidle, on Flickr
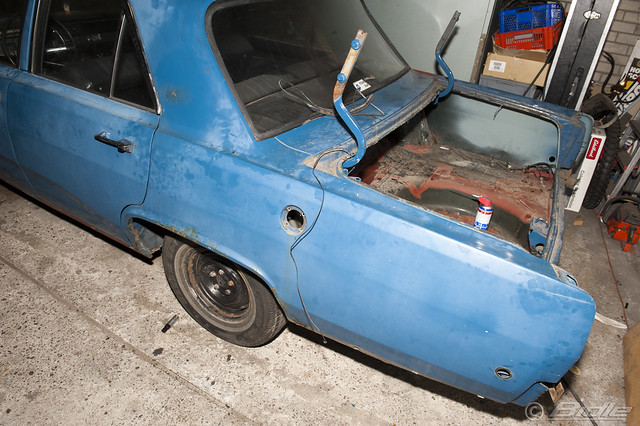
So I had to say the car goodbye again...

Plymouth Valiant 1968 4d 52.jpg by Bidle, on Flickr
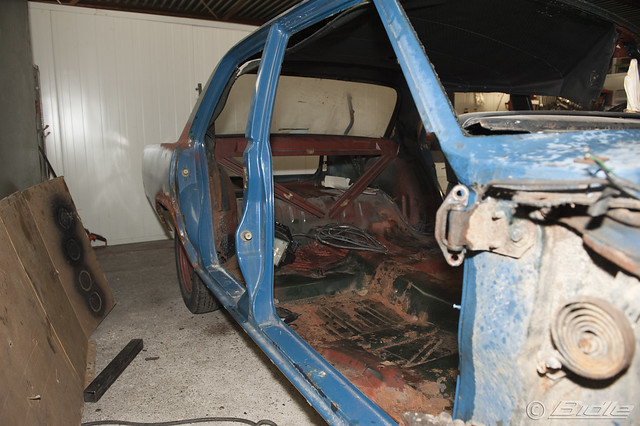
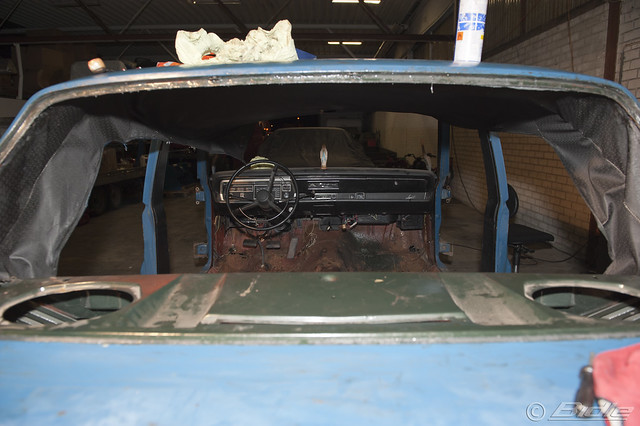
28 august 2011
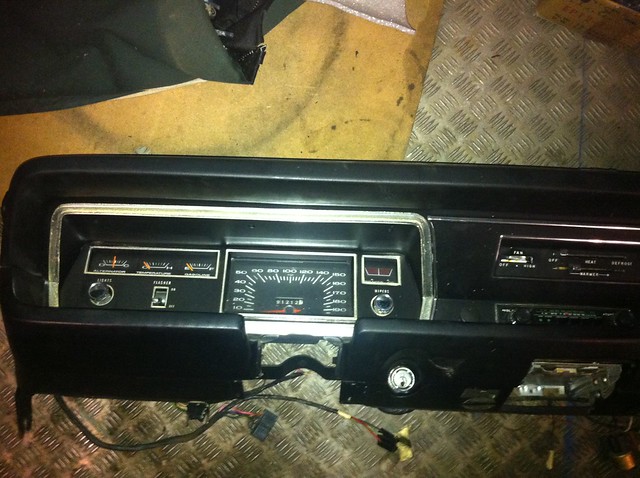
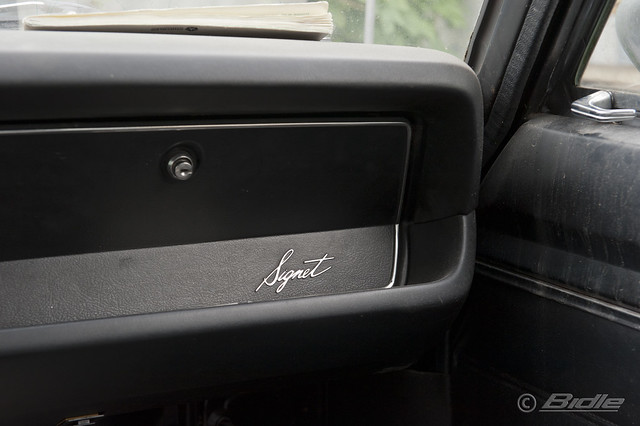
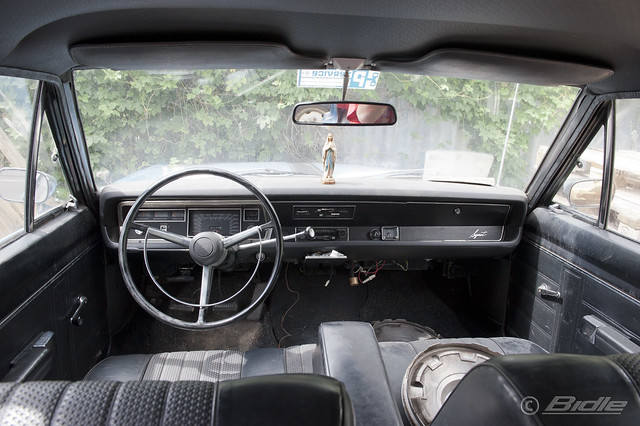
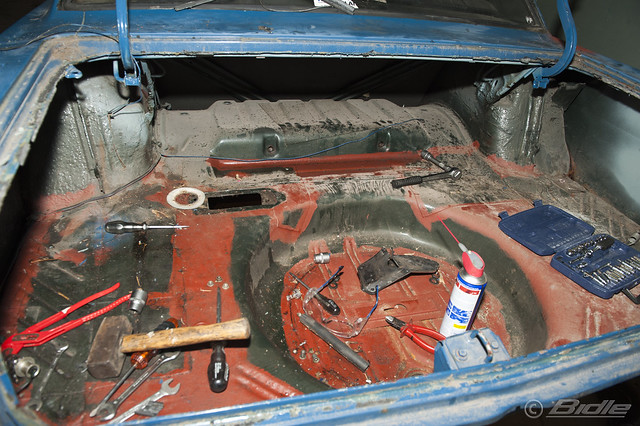
Well the day started great. I easily removed the interior of the car! All seemed to look great...
Plymouth Valiant 1968 4d 55.jpg by Bidle, on Flickr
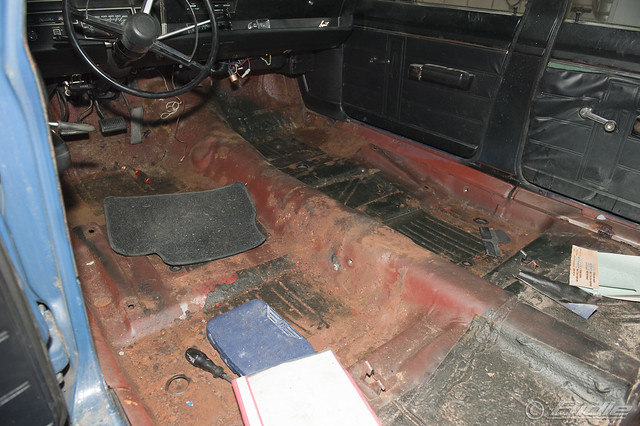
Plymouth Valiant 1968 4d 56.jpg by Bidle, on Flickr
Plymouth Valiant 1968 4d 57.jpg by Bidle, on Flickr
Plymouth Valiant 1968 4d 59.jpg by Bidle, on Flickr
The seats are in great condition and don't have any signs.
Only the doors have some spots below, but that's quit common.
Plymouth Valiant 1968 4d 60.jpg by Bidle, on Flickr
29 August 2011
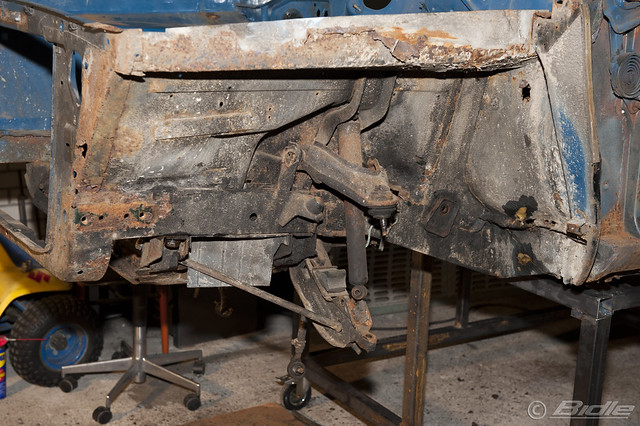
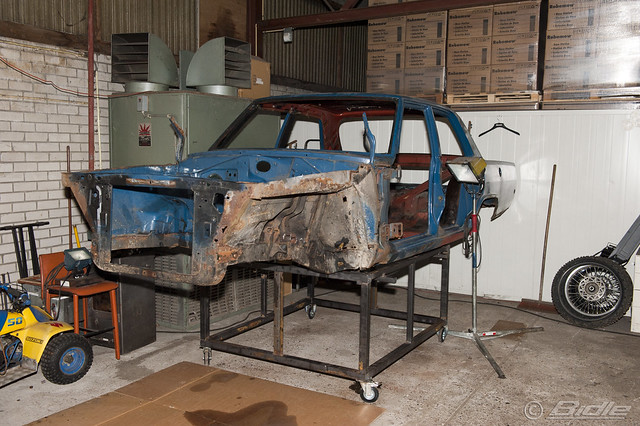
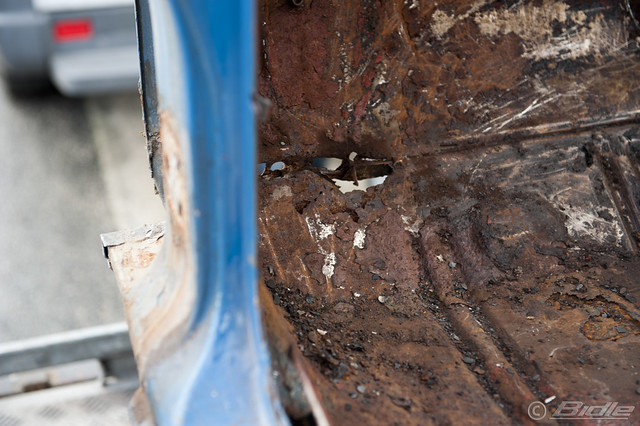
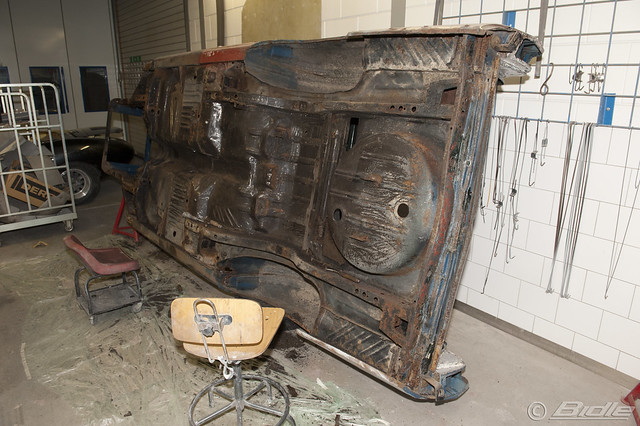
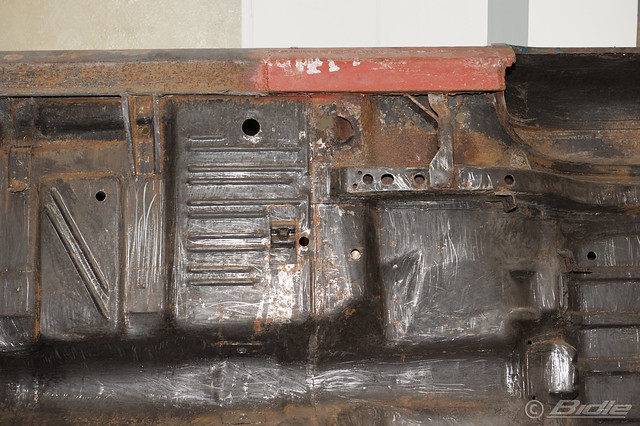
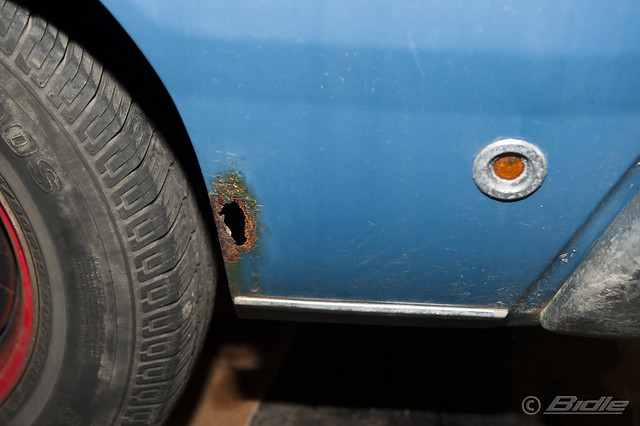
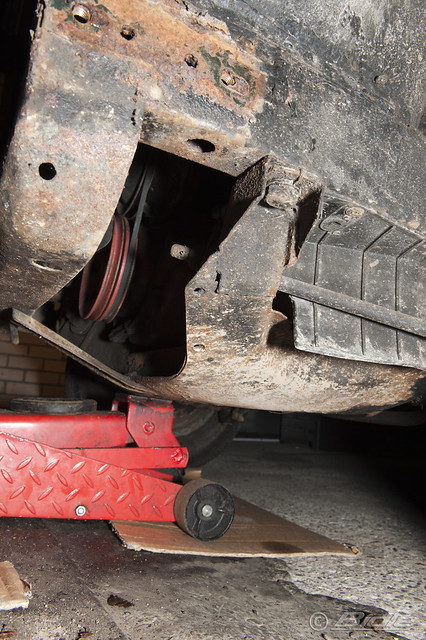
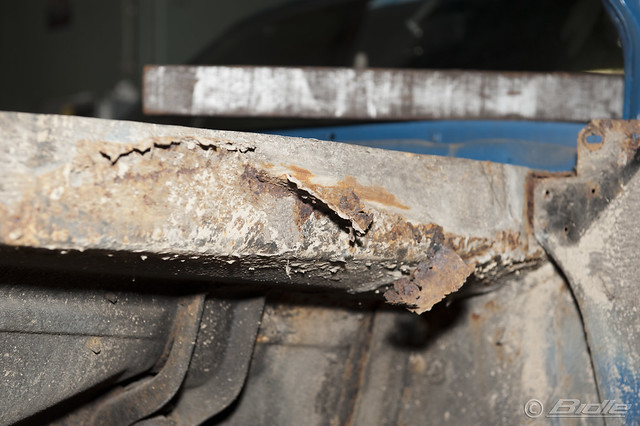
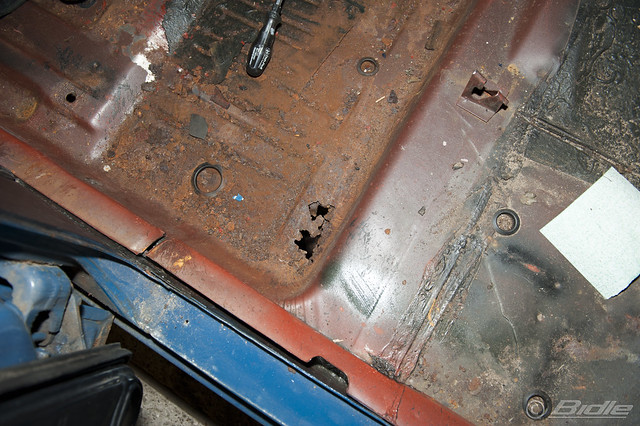
Today I wanted to scrape the floor of the car, but wish I didn't....
So I had to think about the whole restoration. Especially as I'm not an expert and all the work that suddenly showed on my doorstep. What to do next...
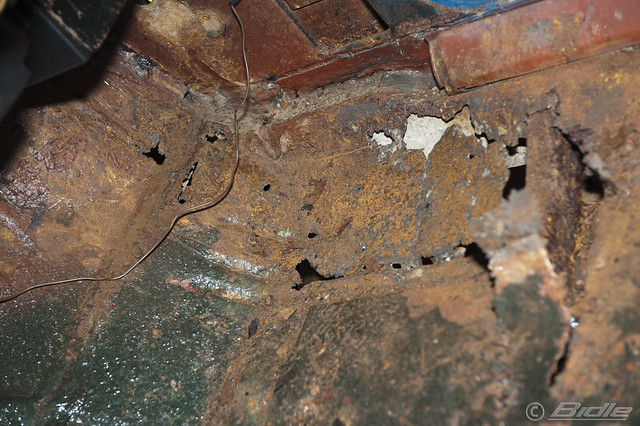
Plymouth Valiant 1968 4d 61.jpg by Bidle, on Flickr
30 august
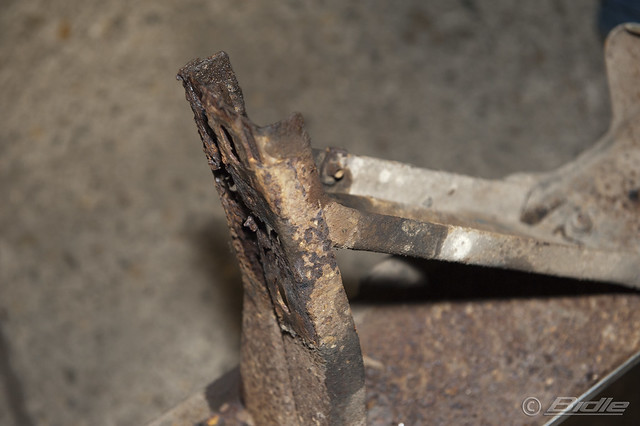
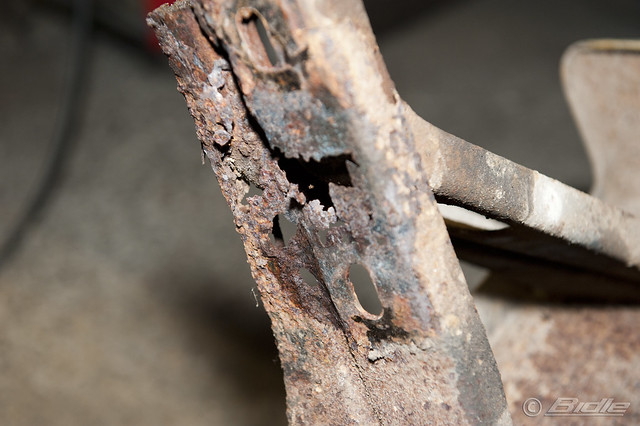
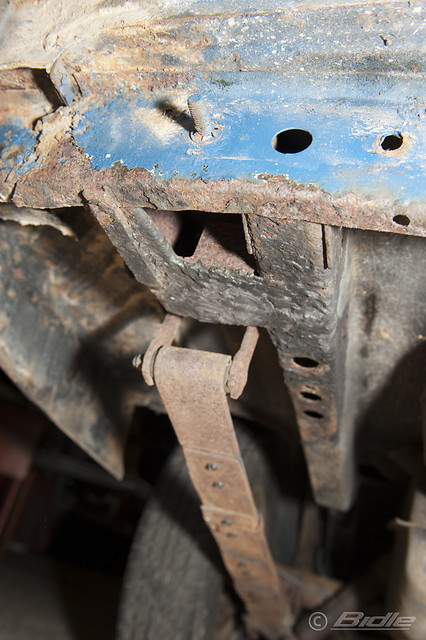
Today I started to gather information about all the possibilities that remain. So I found a address for a new floor-panel, but still the main problem is the beam underneath the car which is completely rotten. Also the beam to the front is in very bad state. Both have to be replaced and as I'm not a welder this means.... time, money, etc.
So I also got lots of info from different experts who perform restorations for a living. At the end it is possible, but a hell of a job. Especially for a rather big investment for a simple Valiant.
Also I got some great info for the advantages and disadvantaged for different baths.
Hmmmmm,.... what will be next.
Well bringing the car to the Junkyard will end it for sure,.. so it couldn't hurt just to cut it open and take a better look at the problem.
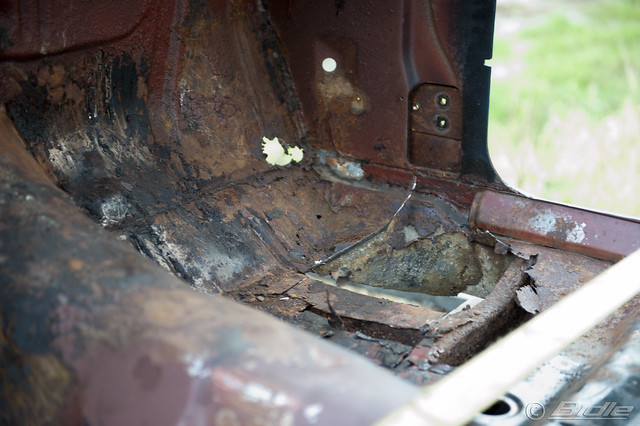
31 August 2011
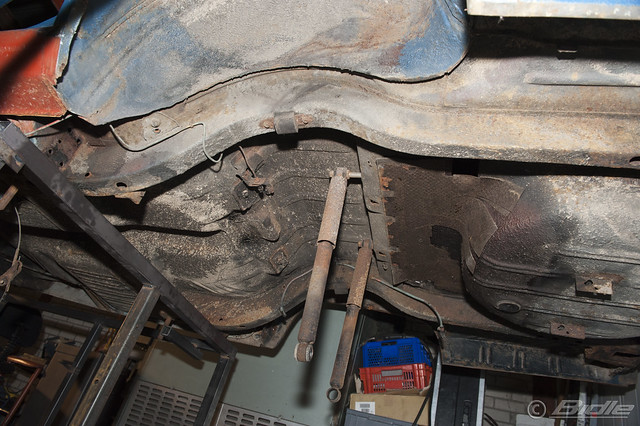
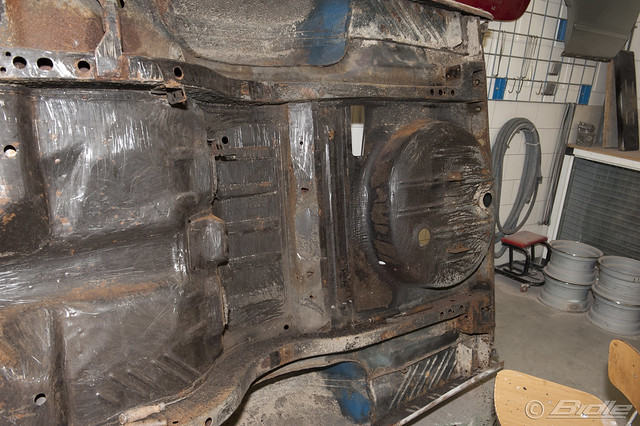
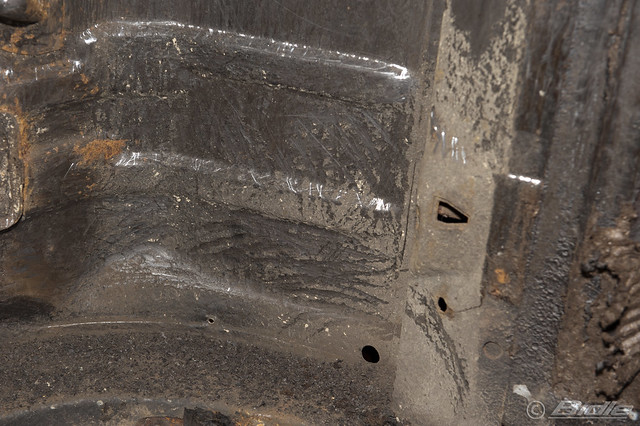
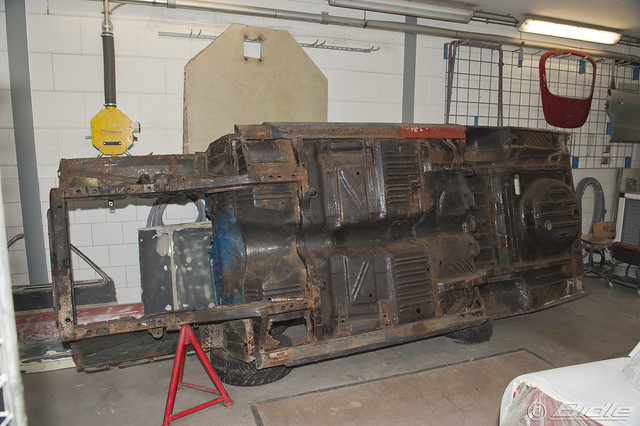
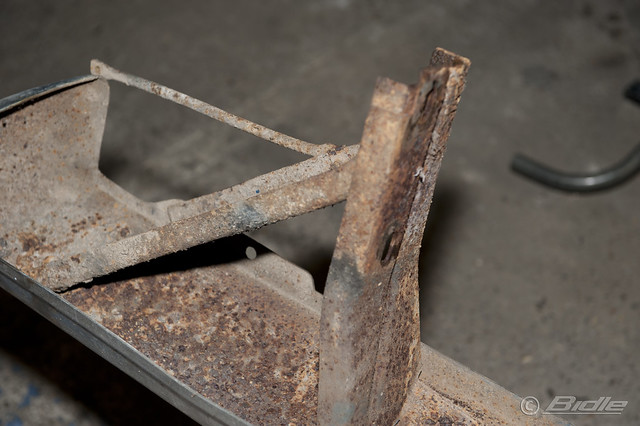
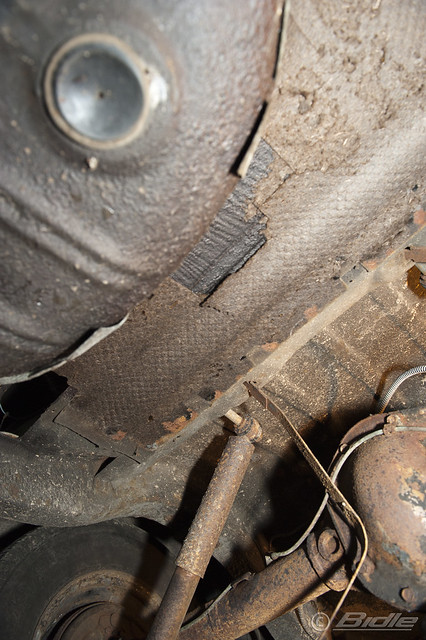
Well today I continued with the Valiant and made a better photo of one of the beam.
Still not sure what to do with this situation...
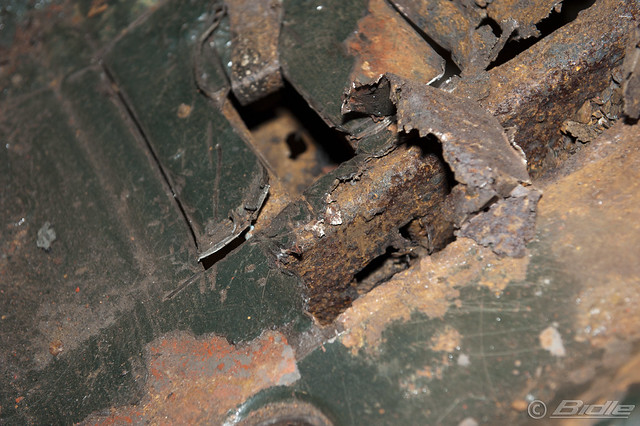
Plymouth Valiant 1968 4d 62.jpg by Bidle, on Flickr
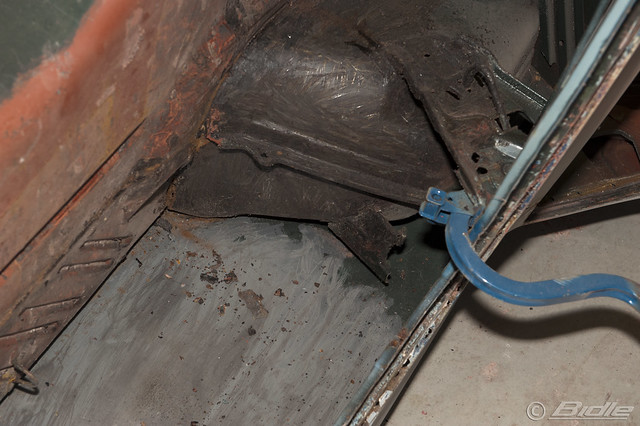
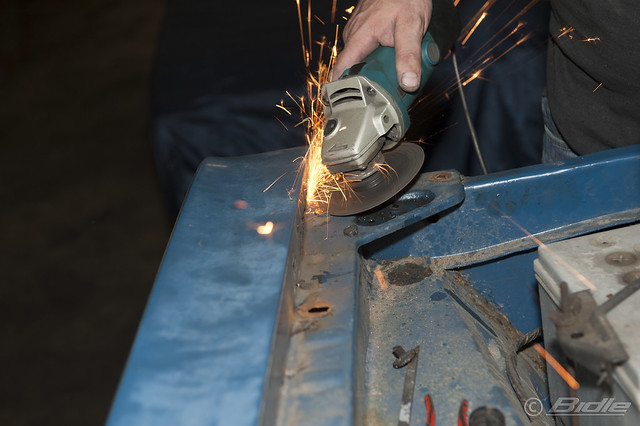
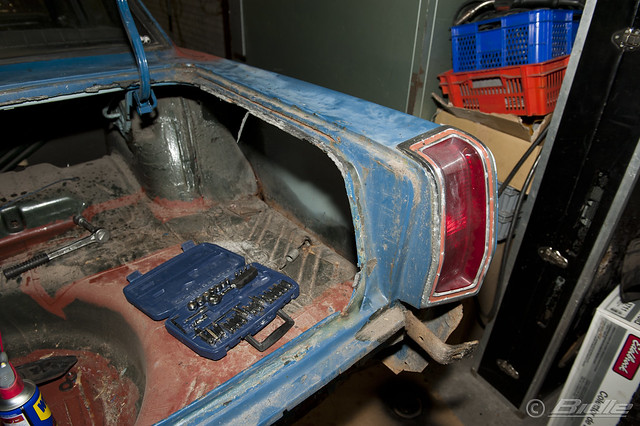
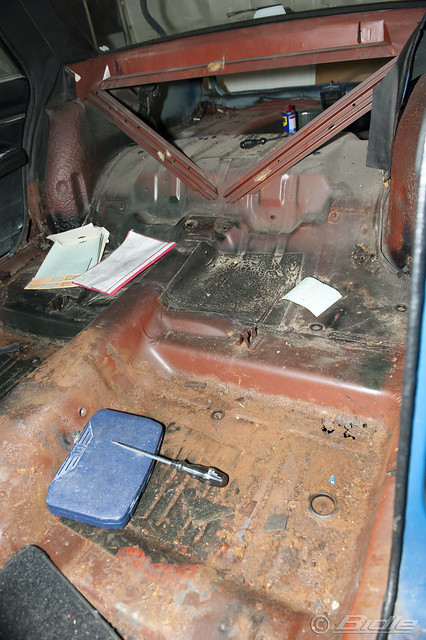
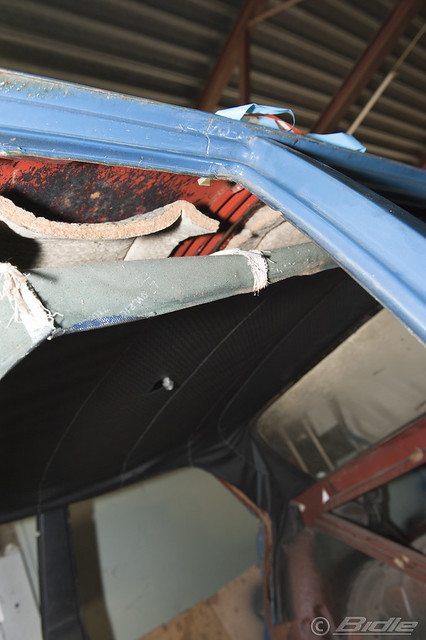
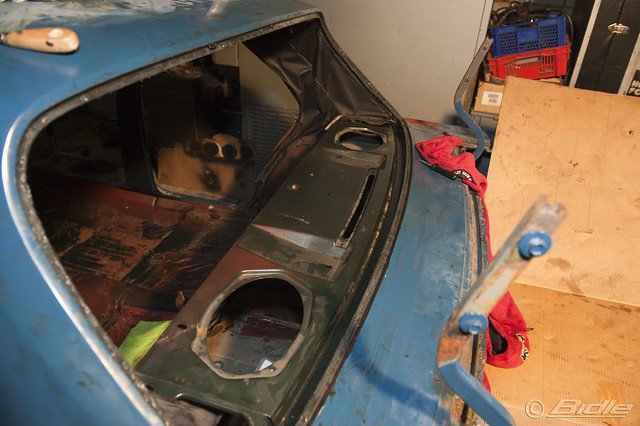
In the mean time I'm killing some time to continue with the rest of the car. So I removed the inner-panels of the door.
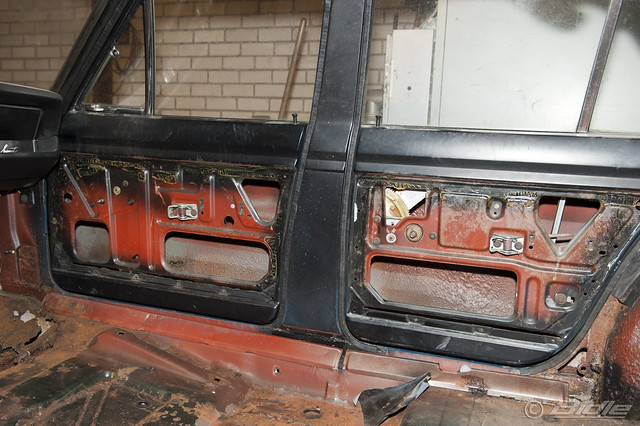
Plymouth Valiant 1968 4d 63.jpg by Bidle, on Flickr
Tomorrow I'll have limited time but will try to remove the door windows.
Plymouth Valiant 1968 4d 64.jpg by Bidle, on Flickr
3 september
I spend more days to get proper info and had a nice message from another member!
Decided to get everything out of the car and to completely sandblast it. So we have a better understanding about the status of the car. Then I can decide what I want to do, but for now I'll start with cleaning the car. Removing kitt etc,.

4 September 2011
Today I wanted to remove the doors and start on removing the ceiling. The doors were pretty easy! Just one jack beneath the door and remove all screws. Only one screw which was really stuck, but a bit of WD40 and it was loose.
Plymouth Valiant 1968 4d 65.jpg by Bidle, on Flickr
Then started on the ceiling but it wasn't in the Haynes book so just carefully removed the 'sunshades' and the mirror, inner lamp, hook for jackets and the Hand... thing..
Soon I discovered how it's made and realized I better remove the windows first.
Plymouth Valiant 1968 4d 66.jpg by Bidle, on Flickr
A friend of mine told me to leave it for someone who did it before, but I had still time on the clock and gave it a go.
Just put a lot of grease in the rubber and opened them. Then I tried a wire but it broke all the time... so more grease and put a screwdriver gently beneath it so.
Then pushed with my feet against the window while somebody pulled away the rubber.... and then it came.
Plymouth Valiant 1968 4d 67.jpg by Bidle, on Flickr
Time flies when you're having fun, so maybe tomorrow the rear window.
Plymouth Valiant 1968 4d 68.jpg by Bidle, on Flickr
5 September 2011
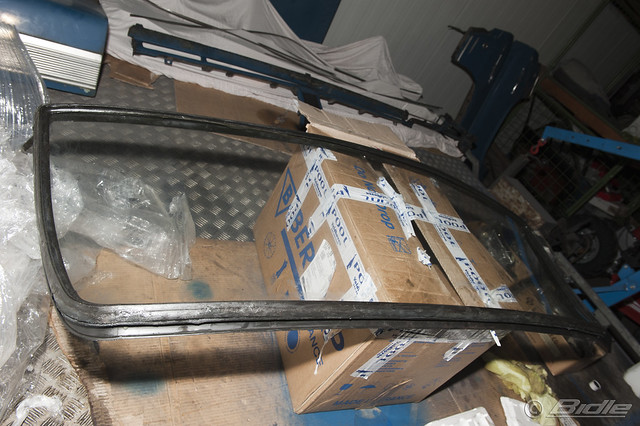
Today I just wanted to prepare the rear-window for tomorrow. Because I didn't had a lot of time, but while your busy you just want to continue. .. So I did.
Unfortunately the window was really stuck and couldn't manage it alone. Then two persons helped me and finally the rear window came out....pfff. Took almost two hours, including my own hassle.
Plymouth Valiant 1968 4d 69.jpg by Bidle, on Flickr
Plymouth Valiant 1968 4d 70.jpg by Bidle, on Flickr
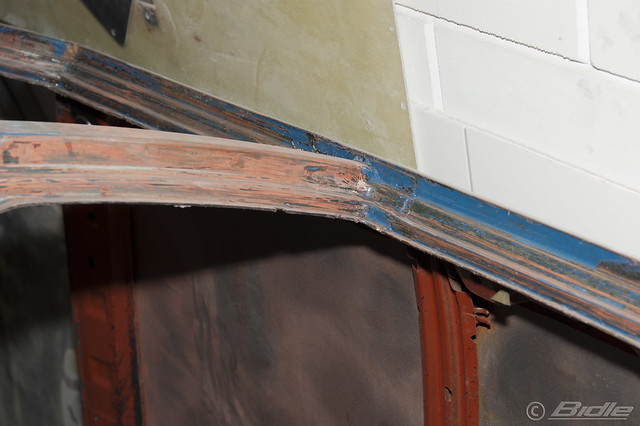
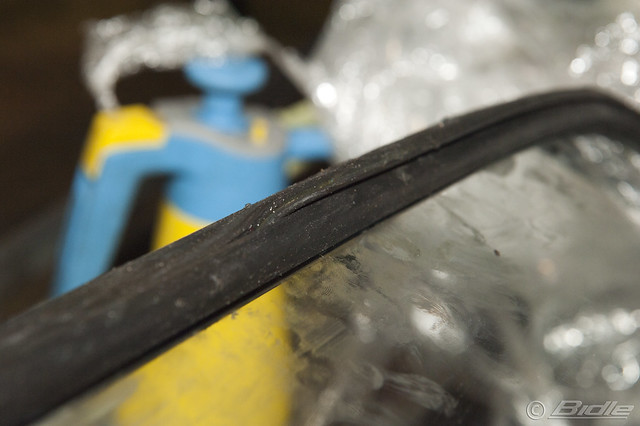
Before storing the window I removed all the kit. And put the gasket on the window for protection. On the detail photo you can see clearly how the gasket is 'flipped' for removal.
Plymouth Valiant 1968 4d 71.jpg by Bidle, on Flickr
Plymouth Valiant 1968 4d 72.jpg by Bidle, on Flickr
Plymouth Valiant 1968 4d 73.jpg by Bidle, on Flickr
So really hope some of you will follow me the coming year(s) and van give me some advice!
Thx!!